Nothing here is my property, im only collecting home pages/posts im interested to use in my creative life like having idea/way how to make something. Making this one only for my individual interests and needs. Thank you for understanding. (click on post title to read/see more)

Šajā lapā ir linku kopums. Te nekas nav mans īpašums, tiktāl cik mans apkopošanas darbs.Šī lapa tapusi manām vajadzībām un ērtībām; bet ja nu gadījumā kādam noder, man tikai prieks.Ceru, ka neaizvainošu iekļauto mājas lapu autorus/ līdzveidotājus sakarā ar klasificēšanu, kas ir pilnīgi subjektīva un attiecas vienīgi uz manām šībrīža interesēm. (ziņu nosaukumi ir linki uz avotu, spiediet virsū un lasiet/skatieties tālāk)

Lapas

Rāda ziņas ar etiķeti svētkiem. Rādīt visas ziņas

Kreppapīrbumbas

Nepieciešamie materiāli:
- kreppapīrs
- diegs, lentīte vai aukliņa
- šķēres.
1. Vienu virs otras saliek 2-4 ~80 cm garas kreppapīra loksnes.
Loksnēm platumu izvēlas tik lielu, cik lielu vēlēsies bumbas diametru.
Loksnes var būt vienā vai dažādās krāsās.
Veido ~3 cm platas ieloces. 2. Apsien aukliņu salocītā papīra vidusdaļā.
Ar šķērēm nogriež apaļus vai trīsstūra galus.
3. Atloca un sakārto katru papīra loksnes kārtu.
4. Papīra bumbu iesien aukliņā.
Izmanto kā dekoru pie loga, griestiem, lampas, vāzē, koku zaros.....

Valentīndienas krellītes


We all know that diamonds are a girl’s best friend, but how about gumballs this year? A new take on the candy necklace, this easy gumball craft is sure to get you some hugs and kisses. You can give these to the sweet girls in your life or hand them out at a Valentine’s Party.

1. Using a metal skewer, pierce one side of the gumball. Hold the top of the gumball steady as you guide the skewer (see photo). This will prevent the skewer from slipping off the slick surface of the gumball.
2. Flip the gumball over and pierce another hole directly opposite to the first hole. If you try to poke a hole straight through both sides at once, the gumball will crack.
3. The hardest part is stringing the ribbon. Use a large needle to thread the ribbon through the gumballs. Thinner ribbon is easier to string. Tie a knot between each gumball as you string it.
Tip: Look for bags of single colored gumballs at your local party supply store.

Valentīndienas krekliņš


Both sides of your sleeves should now look like this.


If you want just ruffle sleeves, you could leave the sleeves like this and skip these next steps.


Now grab your long sleeves and pin those into the sleeve insets, just like you did with the ruffle. Just make sure ruffle stays inside.


Sew the long sleeve in. Repeat for the other side. Now it should look like this on both sides. 


This shirt is really cute the way it is but I wanted to add the ruffle heart. It's a lot easier to add any applique before you sew the shirt closed.

I cut a heart shape out of another tshirt I had sitting around. You can cut it out of your red shirt, I just did it out of another one because it's thicker jersey and I wanted it a little stiffer.

Cut 3 strips of red jersey about 2 inches wide and about 7 inches long. I can't remember their exact size because ruffles are not an exact science. Plus I had quite a bit leftover.

Ruffle those strips like we did with the ruffle sleeves. Shape each ruffle to the heart, pinning each layer and then sewing it down.


Before we cut the excess off the heart, stitch around it to hold your ruffles down.


Cut the excess of your heart now and you should have a cute ruffly heart!


Since the heart is the same color as the shirt, I wanted to add a white ruffle to make it stand out so I cute 3 strips out of my white tshirt. Sew them together into one long strip. Ruffle it!


Pin it all around the heart making sure to catch the heart, the ruffle and your shirt as you pin.


Sew it down. You're almost done! ;)


Your shirt should look like this now. Next let's hem the sleeves!


Iron the ends of each sleeve on top (so the sleeve turns up) about 1/4 inch and then again about 1/2 inch.


Sew down the top and bottom of your fold, creating a nice finished look.

Note: I cut my body pieces out so that they would use the original hem of the shirt but if you didn't, now would be the them to hem it. 


With right sides together (in other words, your shirt is inside out) pin from the sleeve, down the side of the shirt to the bottom. Pin the other side and sew down both sides.

Congrats! You're done! Now grab your phone and tell your friends! ;)

Olu puķes


THIS IS A SIMPLE DECORATION OF EGG SHELLS,YOU CAN EASILY PREPARE IT...


MATERIAL REQUIRED IS;
1- EMPTY EGGS
2- CRYSTAL OR PAPER STAMENS
3- GLUE GUN
4- PAPER TAPE OR FLORAL TAPE
5- BAR B.Q STICKS
6- PAPER RIBBON OF YOUR CHOICE

Papīrpuķu atklātne

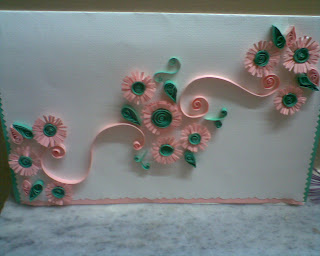
Last day I saw a nice paper quilled card.I thought its hard to create paper flowers...and the tools used for its making were also looking complicated....so I try something simple to make a nice quilled card...
I am sure this will be easy for you to make...
 Lets check tutorial...its totally handmade


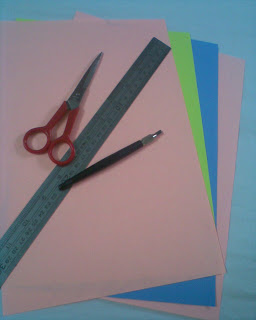
 These are materials

You will need just these materials...
Colorful paper sheets..A4 size
Paper cutter
Scissor
Glue

Cut some strips of papers

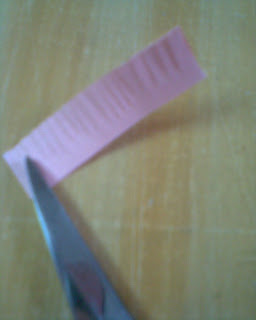
 Fold the paper and make little cuts as the picture is showing below

When you open the whole strip...there will be so many cuts in one time cutting


Now roll the paper strip with the help of finger and thumb...I did not use any tool for making the whole quilling


Paste its end and make a circle...its up to you that you make a loose circle or tight...I like this loose circle!!!


Make as many center buds as you desire....


Lets start processing...


Fix the center bud on the strip...and use the glue to fix it nicely
Complete the bud


Now press lightly...
And the flower complete...
make some more flowers and
Now arrange the flowers on a card


This is the method of making Petal for flower

Now these are some experimental looks...