
Rāda ziņas ar etiķeti drēbes. Rādīt visas ziņas
Rāda ziņas ar etiķeti drēbes. Rādīt visas ziņas

Valentīndienas krekliņš


Both sides of your sleeves should now look like this.

If you want just ruffle sleeves, you could leave the sleeves like this and skip these next steps.

Now grab your long sleeves and pin those into the sleeve insets, just like you did with the ruffle. Just make sure ruffle stays inside.

Sew the long sleeve in. Repeat for the other side. Now it should look like this on both sides.

This shirt is really cute the way it is but I wanted to add the ruffle heart. It's a lot easier to add any applique before you sew the shirt closed.
I cut a heart shape out of another tshirt I had sitting around. You can cut it out of your red shirt, I just did it out of another one because it's thicker jersey and I wanted it a little stiffer.
Cut 3 strips of red jersey about 2 inches wide and about 7 inches long. I can't remember their exact size because ruffles are not an exact science. Plus I had quite a bit leftover.
Ruffle those strips like we did with the ruffle sleeves. Shape each ruffle to the heart, pinning each layer and then sewing it down.


Before we cut the excess off the heart, stitch around it to hold your ruffles down.

Cut the excess of your heart now and you should have a cute ruffly heart!

Since the heart is the same color as the shirt, I wanted to add a white ruffle to make it stand out so I cute 3 strips out of my white tshirt. Sew them together into one long strip. Ruffle it!

Pin it all around the heart making sure to catch the heart, the ruffle and your shirt as you pin.

Sew it down. You're almost done! ;)

Your shirt should look like this now. Next let's hem the sleeves!

Iron the ends of each sleeve on top (so the sleeve turns up) about 1/4 inch and then again about 1/2 inch.

Sew down the top and bottom of your fold, creating a nice finished look.
Note: I cut my body pieces out so that they would use the original hem of the shirt but if you didn't, now would be the them to hem it.

With right sides together (in other words, your shirt is inside out) pin from the sleeve, down the side of the shirt to the bottom. Pin the other side and sew down both sides.
Congrats! You're done! Now grab your phone and tell your friends! ;)

Smuki svārciņi

In the past, I would have just written this off as a failed project, but not this time. I looked at the fabric, and the design, and thought about how I could fix it. What I finally decided to do, was make it an a-line skirt. I love the way an a-line dress or skirt fits my body, and thought that I could work with that material and that pattern. I began by turning the skirt inside-out, and cutting triangles of fabric out of the fabric. I cut out eight pieces. They were each about 8 inches at the bottom (but remember that it is folded, so you should only cut 4 inches).

I then sewed the gaps shut with a sewing and binding seam on my machine.


When I was finished with all the gaps, it looked like this (still inside-out).

I then cut the bottom and hemed the skirt to fit me. Now what I needed was something to really give this skirt some identity. I used the extra fabric I had from all the disections, to create verticle ruffles. I cut strips about 2.5 inches wide. That were roughly 1.5 times the length of my skirt from waist to hem. I used the largest stitch on my sewing machine to sew through the center of each strip. I created the ruffles by pulling gently on one thread until the fabric puckered to the right length.

To finish, I pinned each ruffle on top of a seam, and stitched in place. I wore my upcycle to work yesterday, and the first thing anyone said to me was, "cute skirt Malory."


Tekstilkrāsa un balinātājs
 Today was my boys first day back to school. They started on a Friday?!? We lucked out with awesome teachers this year! The boys are always wanting to sew & do crafts with me so we decided to do some bleached shirts. I had them each pick out two plain shirts from their closets. We then googled different silhouette images of things they liked & they each picked out two. I traced the image outlines onto freezer paper.
 We decided to do three with soft scrub with bleach & three like these at under the sycamore. So when I cut out the images I had to keep in mind which way I was doing each image. The soft scrub ones I needed to keep the negative pieces & the spray bleach ones I need to keep the positive pieces. On the Dr. Who space machine (Tartus?) image I put x's on the pieces I needed to iron on so I wouldn't get mixed up.
 If you have boys that are into all things strange check out the new Dr. Who, my boys LOVE IT!
 Next iron on all your pieces & keep the shirts flat so the edges of the freezer paper don't peel. For the soft scrub shirts put a piece of cardboard in between the shirt underneath the image. Dab on soft scrub over the image (I just used a paper towel, but you could use a white washcloth). Let sit for 5 minutes then rinse off very well & peel off the freezer paper.
 For the other shirts I just used Ashley Ann's instructions except that I didn't use the cardboard and I used a hanger & hung them by my dead tree (I'm not sure if bleach can harm trees or not). I did one shirt at a time so I could supervise my boys better. The first two the bleach soaked through the freezer paper and so I colored in the edges with colored sharpies.

 The last one I had my son spray it first telling him to try to not hit the freezer paper. Then after he was done a lightly misted around the image. That way the bleach didn't have as long to soak through the paper. This shirt turned out perfect. On the spray bleach shirts I only left them in the sun 2-3 minutes before I rinsed them off. I washed all the shirts with the extra rinse cycle right after we were done too.

Tekstilidejai

Tip- If you make shoes like this (for yourself or your little ones) use some puffy paint on the bottoms to create a non slip surface. You can do simple dots or get creative and write things. I thought using glow in the dark paint and writing "BOO" on the bottoms of these would be really cute!

Naģene


Sew it up and turn it right side out. It should then look like this.

From this point on, things get a little sketchy. Making the actual hat part was no problem for me. The brim was another matter entirely. I stopped taking pictures at this point because of frustration. I made three different brims on this hat but never felt like they fit just right. Here is how I finally figured it out. (In words, no pictures sorry)
I put the hat on and decided where I would want the brim to begin and end. Then I traced an arc onto the skirt fabric using the hat as a guide for where it should go. I cut out two arcs and then sewed them right sides together only around the arc part. After that, flip it right sides out and top stitch the brim in two strips. (See picture below:

Then to attatch the brim to the hat, put the right side of the brim against the wrong side of the hat and top stitch.
The waistband had two buttons and button holes which I thought would add a lot of character to the hat so when I cut out the hat I cut it so that the button holes were part of the hat and then sewed the buttons on top of the button holes. I also used a little lace from the bottom of the skirt to finish it off.

I really like the way it looks, and the good news is.....It fits Charli's head! YAY! Here she is wearing it.

Efektdzijas kostīms
Septembrī Super Neto veikalā ieraudzīju šo dziju, un man to vajadzēja! Super ātrā tempā tapa kostīms meitiņai. Tiesa, stāvu būtu vajadzējis mazliet garāku, jo dzija raujas uz augšu, bet es izbraukāju visus Liepājas Super Neto veikalus - tieši šī krāsa tika izpirkta zibens ātrumā.
Materiāli:
Efektdzija izgāja 5 fices / 50 g.
Akrila parastā dzija 3 kastītes, pāri vēl gali palika. Akrila dzija pārdevās garenās kastītēs pa 4 mazām ficītēm no katras krāsas, kopā 25 g, plus #4 bambusa adatas, apmēram 20 cm garas.
Pogas gan ilgi un rūpīgi meklēju, bet tās diemžēl pazūd bārkstīs. Vienīgi žēl, ka dzeltenā svītra iekārtojusies tieši uz ceļiem - pamatīgi dabū ciest no mana aktīvā bērna :)


Tauriņmeitenes kostīms

(I figured this was an easy outfit to throw on a long-sleeved white shirt underneath......and cozy white tights. Perfect for the cool Halloween evenings.)
And even if you already have a costume for this year.......consider creating one of these for your dress-up box. (Everything purchased for both costumes was under $3 a yard. This time of year is the perfect time to find unusual fabrics for a very great price. Even at your local fabric stores.)
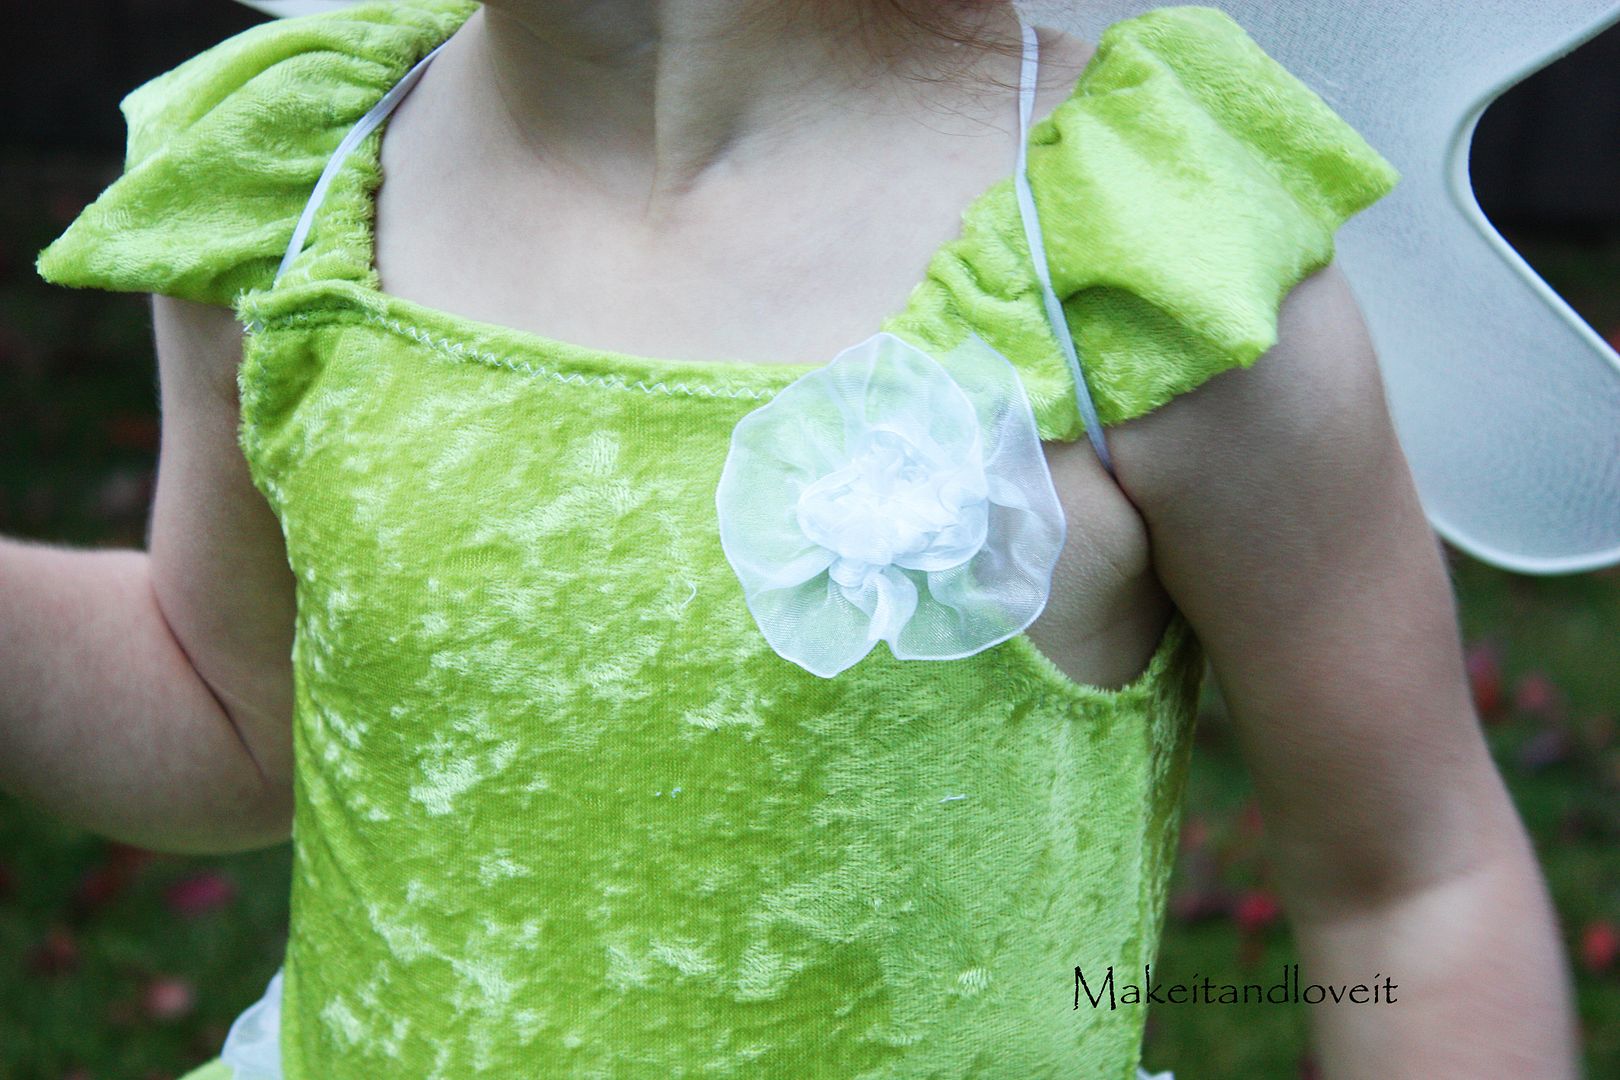
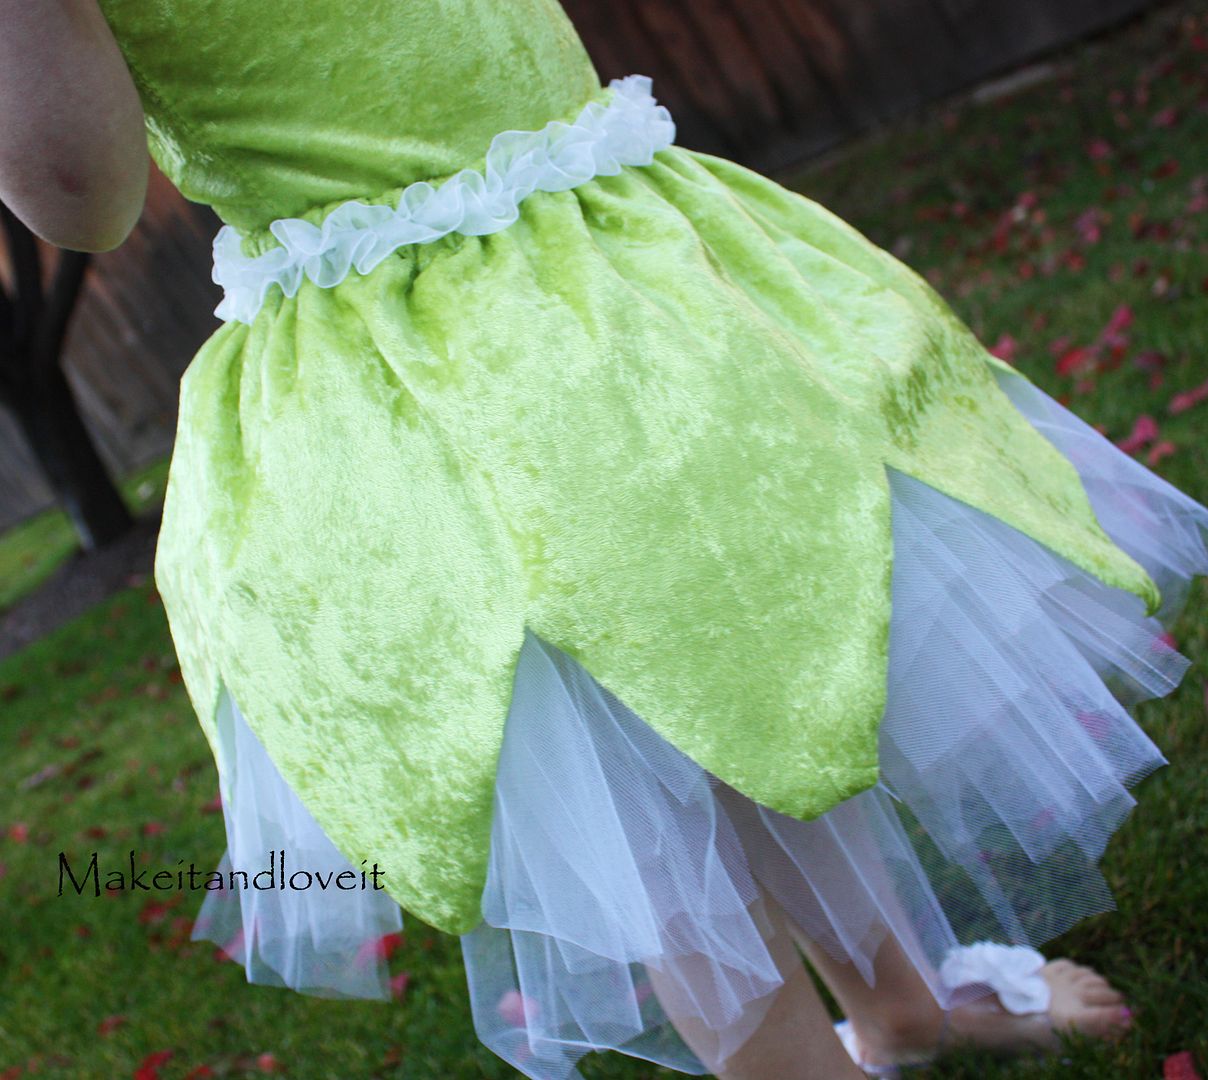
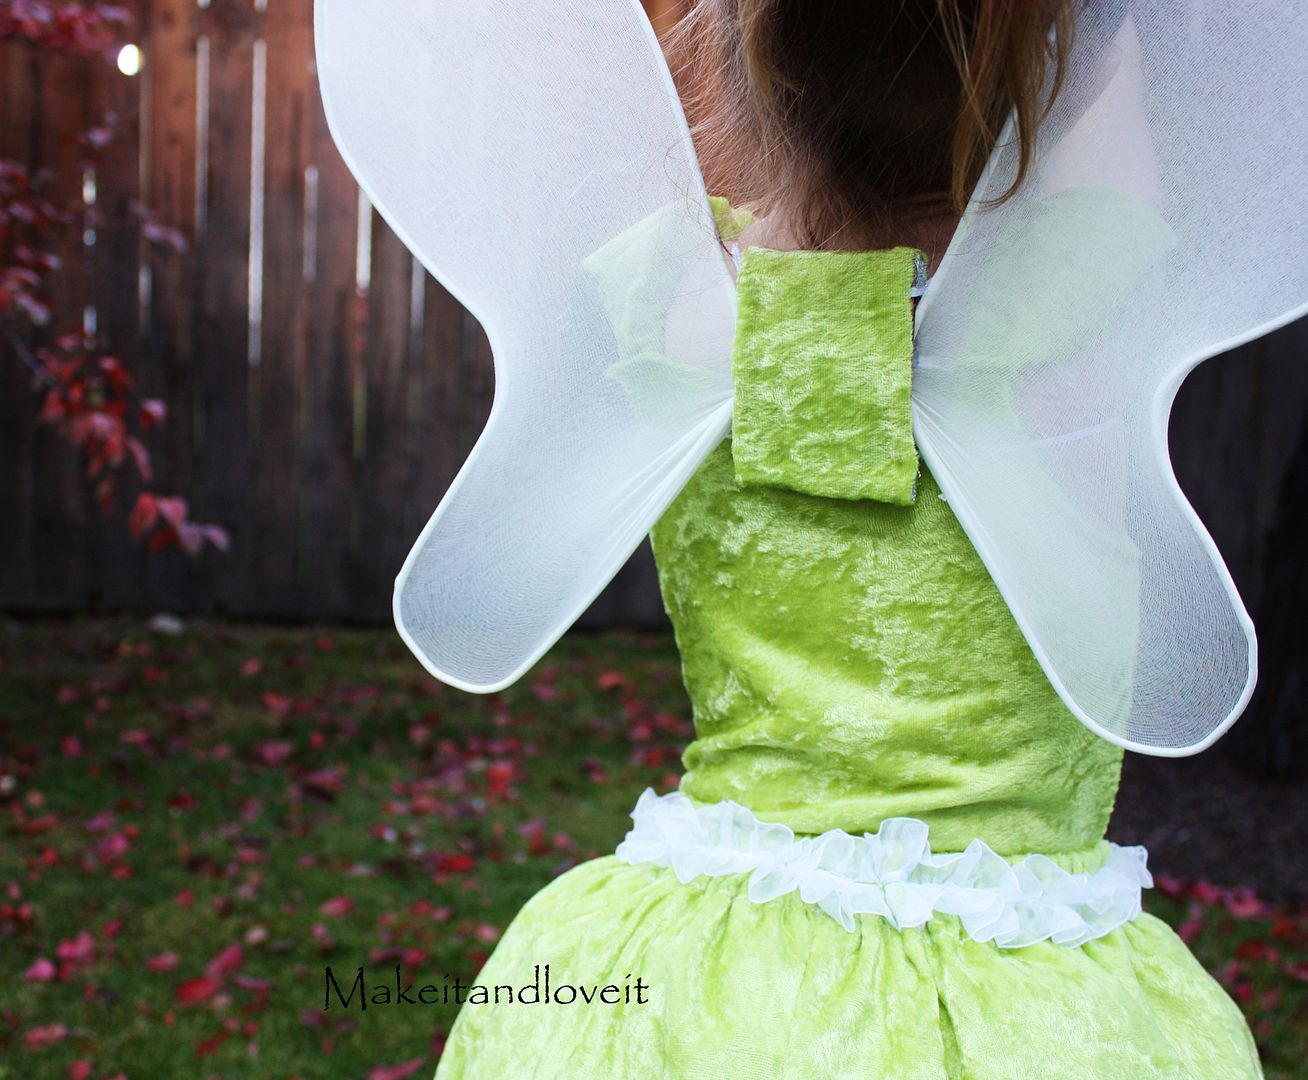
Oooh, I can't wait until next week. My little lady is so mad that I made her take it off after taking pictures. She so badly wants to flit around the room in her little "tinka-bell" costume. And man, nothing makes me grin bigger than seeing the splendor of imagination.
How to make Tinkerbell?
(There are so many parts to this costume that I'm trying to fit into one post so I'm trying to keep it as brief as possible. I'll link to other tutorials when appropriate and am only posting minimal pictures for each part of the costume. If you have specific questions...let me know)
First, start with the bodice. I patterned it after an old swimsuit. Make a pattern by folding the swimsuit in half lengthwise to trace the front piece.....and then again for the back piece.

Then cut out your front and back pieces out of something stretchy. (Mine is a knit blend....not sure what it's called. But it has a fuzzy texture...but stretches well.) Sew the front and back pieces together along the sides and bottom, with right sides together.

Then turn under the raw edges of the leg holes.....using a zig-zag stitch to allow for stretch.

Then turn under the arm sections, and the top front and top back sections.

Now, you're going to create 2 flutter sleeves. Here is the basic shape of each sleeve. I needed sleeves that were 6 inches long (not width). But I made them 10 inches long to allow for gathering. At its widest point, they are about 3 inches wide.

Then make a casing for the elastic by turning under the long straight edge, about a half inch. Then thread a piece of narrow elastic through the casing. (I needed my should strap to be 6 inches long, so I cut my elastic piece 6 inches long as well. After attaching the sleeve and using some for the seam allowance, it will be a little less than 6 inches. But this will allow for some stretch and will keep the sleeves up on the shoulders, perfectly in place.)

Then sew the elastic along one end of the casing to secure in place, pull the elastic the rest of the way through, and sew along the other end of the casing to secure the other end of the elastic.

Pin in place and sew several time along the front and back corners of the costume. Repeat with the other shoulder. (I didn't hem the other edge of the sleeve because this fabric is knit and doesn't fray.)

Then cut out some of your same material for your skirt. My little girl is about 19 inches around the waist so I doubled that and made my strip 40 inches wide. And I made it about 14 inches long. Then I cut triangle cuts out of the bottom. Then I sewed the shorts ends together, to create a tube, one step closer to a skirt shape. Then I created a casing and inserted elastic, just like the tutorial here. (And I didn't hem the triangle edges because the knit I used doesn't fray.)

Then, I added some trimming to the waist of the skirt. Be careful if you are sewing on top of the elastic to stretch it as you go. Then if you let go, it will stretch back into place....and will ruffle up your trimming a little bit more. Otherwise, if you don't pull the elastic, you sew your elastic in place and will restrict its elasticity. (The trimming looks like the strip above the skirt, already ruffled and ready to go. You can buy this stuff by the yard at the fabric store.)

Then I made a tutu to go under this skirt by using the tutorial here.
Then I made the wings by bending two wire hangers to the desired shape.

The I cut off the hook shape of the hanger and then slid cheap-o little knee highs over the hanger shapes and rubber banded them nice and tight at the base.

Then I placed a piece of cardboard under the ends and hot glued them into place. Then I put tons more hot glue on top, then place another piece of equal sized cardboard on top of that. Press the two pieces together firmly and hold until cooled. Make sure you used plenty of glue and that the wings are even and straight.

Then I ended up trimming the cardboard to be a little smaller and added some elastic for the arm holes. Then I wrapped the cardboard in the same material as the costume..........and hot glued it in place.

And I forgot to take pictures as I was making the wand. But I made it by gluing 2 cardboard stars to one end of a wooden dowel.....hiding the end of the wooden dowel between the two pieces of the stars. Use plenty of glue and press the stars together firmly. Then I coated the star in elmer's glue and sprinkled plenty of glitter over it. Then I wrapped the wooden dowel with some sparkly ribbon. And then tied some sheer ribbon around the top, right under the star. All part of the magic!!
Sorry, this is the best picture I got........just wasn't thinking.

Whew, I think that's it. (Let me know if you have any questions while making your own.....there was a lot I was trying to squeeze into this one post.)
Now let your sweet girl flit and flee around the house.....creating all sorts of magic and wonder right before your eyes.

Abonēt:
Ziņas (Atom)