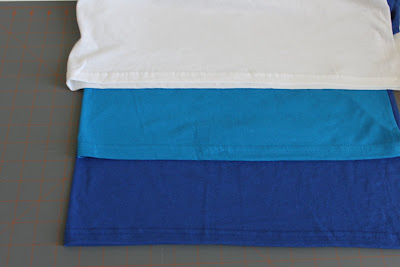
 My dollar store has recently re-stocked their T-shirts -- called "seconds," usually for a tiny hole or some other minuscule flaw -- and there are so many bright and fun colors. As you can see, I got a little carried away and purchased 15 shirts!
 STEP ONE: Pick and arrange three colors how you like them. Keep in mind that your tiers will be narrower as you go up -- choose shirt sizes accordingly.
 STEP TWO: Cut out all your pieces. For the bottom tier, utilize the hem of that T-shirt! I cut my bottom tier 6 1/2" wide.
 Also cut two 1 3/4" strips from the same T-shirt as your bottom tier. These will be your binding strips/straps for the bodice of the top.
I cut my second tier (lighter blue) 5" wide (not pictured).
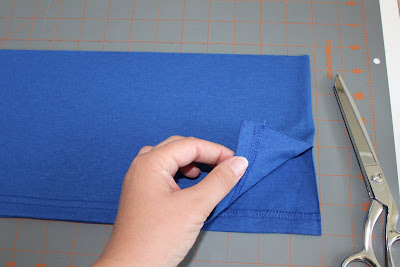
 Since you are cutting pieces from T-shirts, your strips will be tubes. Cut one side of each tube so each becomes one long strip.
 Cut the bodice from your final T-shirt. I created a pattern by tracing an existing tank top -- front and back are the same. I cut four pieces because my white T-shirt was rather sheer -- double layer for both front and back.
(Check out how I utilized the sleeves!)
 STEP THREE: Gather the top edge of the bottom tier. This is easier than you think!! I increased my stitch length to 5, which is the longest it can be, then increased my upper tension to about 5 1/2. Sew, but do not backstitch -- just in case you want to rearrange your gathers. Magic! Automatic gathers!
 STEP FOUR: Change your sewing machine's tension back to its original setting. Using a narrow and long zigzag stitch (this will allow your seams to still have some stretch), attach your bottom tier to your middle tier, right sides together, just beyond your gathering stitchline.
I placed my middle tier right side up and layered the bottom tier right side down on top. (In the photo they look the same color, but the lower layer is the lighter blue!) Having the gathered tier on top makes it a little easier to control your gathers and keep them even.
 Looking good already!
(I do this the lazy way, and simply trim tier two to match the bottom tier AFTER they are sewn together. Works great!!)
 STEP FIVE: Press your binding/strap strips wrong sides together, lengthwise down the strip. Then fold each edge to the center and press again.
STEP SIX: Bind the top edge of your bodice front and bodice back.
Lay your bodice right side up, and align one raw edge of your binding right side down on top. Sew with a 3/8" seam allowance. Fold binding around and topstitch in place. (See Steps Eight and nine if this makes no sense to you!)
STEP SEVEN: Layer your bodice front and back right sides together and sew ONE side seam. Gather your second tier and attach it to the bodice, using the same method as Steps Three and Four. Then sew the other side seam for the entire top.
 STEP SEVEN: Mark the center of one strip and pin it to the side seam of the arm opening. Pin around arm opening, then sew in place using a 3/8" seam allowance.
 STEP EIGHT: Fold binding/strap strips together using your pressed lines (from Step Five) as a guide. Pin.
 Sew about 1/8" from folded edges starting at one end of strap and working your way to the other end. Repeat Steps Seven and Eight for opposite arm hole.
 Tie the top on your little one! It's done!
Depending on the size of the T-shirts you are using, this will work to make tops or skirts for older girls too!


Nav komentāru:
Ierakstīt komentāru